Roku is an admired media player with a dedicated remote to control it. As a Roku user, you should know about the resetting procedures of your remote. Because there are numerous factors that affect the functionalities of the Roku remote while using it. In such cases, you need to perform some techniques to fix Roku Remote Not Working issues and other malfunctions.
If all the basic and advanced troubleshooting methods didn’t solve the problem, reset your Roku remote in order to fix the issues associated with it. After resetting, you need to pair it again and use it without any obstructions.
Let me show you the steps you should follow to reset any kind of Roku remote.
How to Differentiate Roku Remotes
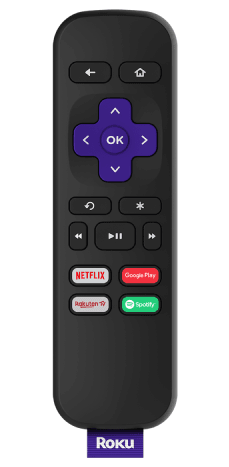
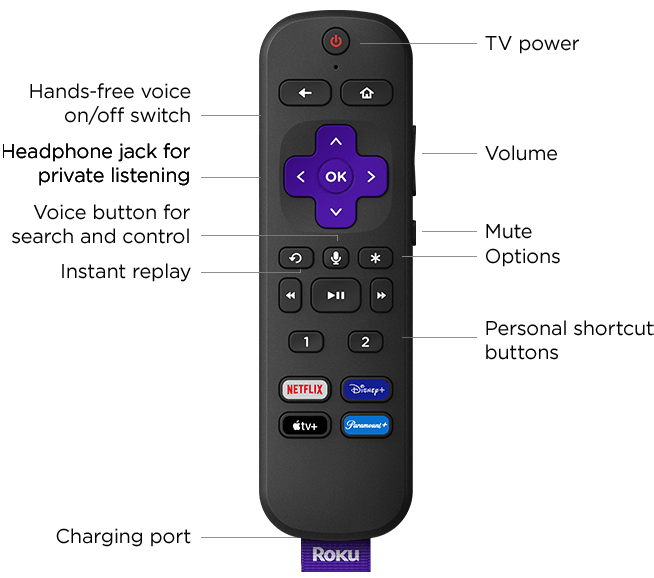
There are two major types of Roku remotes. Simple IR Roku Remote, and Enhanced Roku Remote. With Enhanced remotes, you can control Roku by pointing the remote anywhere, whereas the Standard IR remotes need to be pointed in the direct line to control your Roku device. The Standard IR Roku remote is the oldest one. The two models of enhanced remotes won’t differ much. Check the table below for easy identification.
| Remote Name | Image | How it differs from others |
|---|---|---|
| Simple IR Roku Remote |  | It transmits infrared light (IR) to control and it doesn’t have volume buttons and a voice button |
| Enhanced Roku Remote |  | It controls the player using radio frequency (RF) energy and Volume Buttons on the right side & voice button on the remote |
How to Reset Roku Remote
Since there are two different types of Roku Remotes available for your device, you need to choose the one you have and follow the respective instructions for the resetting process.
How to Reset Simple IR Roku Remote
The Standard IR Roku remote won’t have any reset option. You can remove the batteries from the remote and keep the remote idle for a few minutes. Then, press all the buttons on the remote at least once to drain the residual power. After that, insert the rechargeable batteries and pair the remote to your Roku device. This will fix most of the issues on your remote.
NOTE: All these steps discussed here are applicable to various Roku TV brands like Hisense, Onn, and Sharp.
How to Reset Your Roku Enhanced Remote
Enhanced Roku remotes and gaming remotes are known as enhanced remotes. Do follow the below steps to reset enhanced remotes.
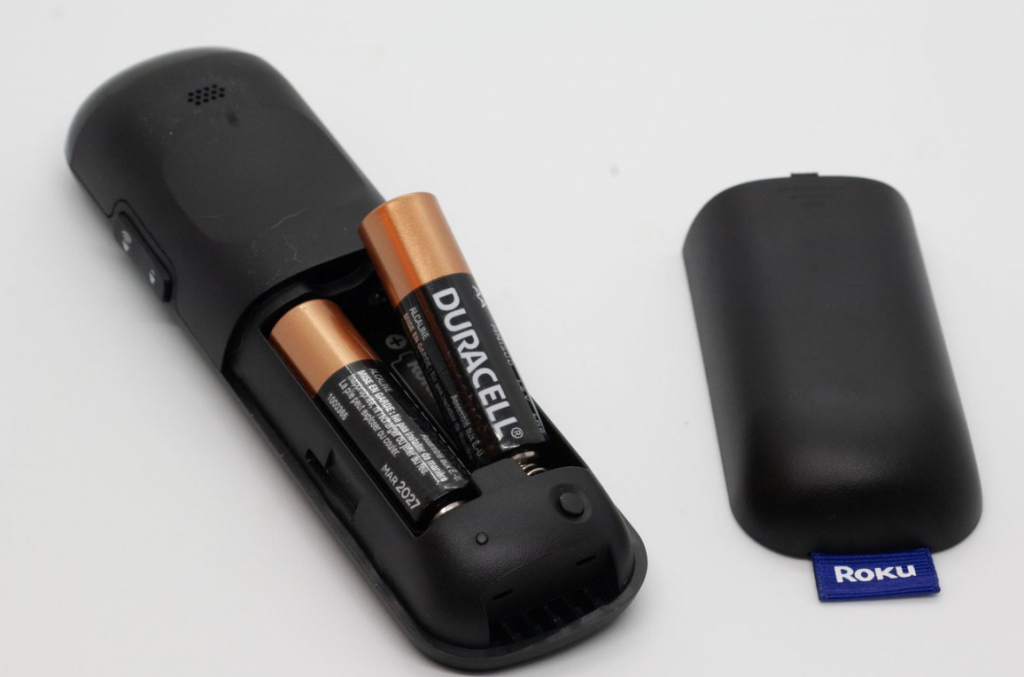
1. Initially, remove the battery cover and take out the battery at the bottom of the remote.

2. Next, turn off the Roku device or TV.
3. Leave it disconnected for more than a minute.
4. Plug back the power cable into the Roku receiver.
5. Put the batteries back into the Roku remote when you view the home screen.
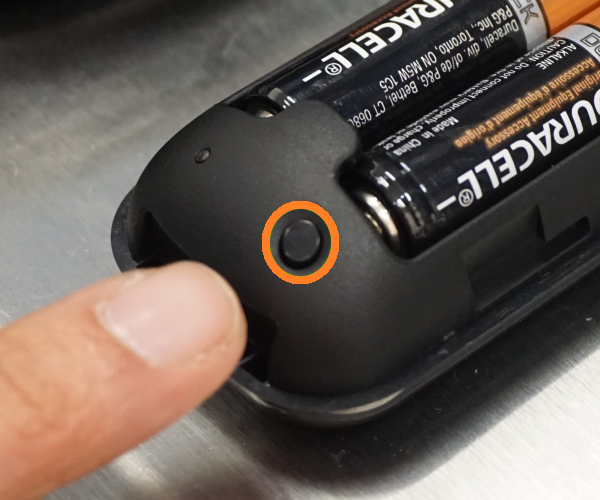
6. Now, press and hold the Pairing button at the bottom of the screen.

7. The light on the remote indicates that your Roku remote is unpaired and repaired again.
8. Now, a remote pairing prompt will appear on the screen.
9. Finally, you are ready to use your Roku remote.
Alternative Fixes for Roku Remote Not Working Issues
In case your enhanced Roku remote is not working after resetting it, you can try the below-mentioned alternative fixes.
Check and Troubleshoot Roku Remote Battery
If you have been using the Roku remote for a long time, there are possibilities that the remote’s battery is running at low power. This will lead to the Roku remote not working issue. So, you need to open the back cover of the remote and replace the batteries. To solve the basic issue, you need to remove the battery and reinsert it.
If you have a Standard IR Roku Remote, you can control your device immediately after the reinserting process. On the other hand, the enhanced Roku Voice Remote users wait for 30 seconds to establish a connection to their Roku device. In case the remote is not working after replacing the new battery, you can move on with the next fix.
Update Roku
Alternatively, you check for software updates and make sure Roku firmware is up-to-date. If you are using the older version of the Roku streaming device or TV, you might have some pairing and performance issues. Update your Roku device to its latest firmware to solve the issue.
Use the Roku Remote App
The next fix is to use the Roku remote app, you can install the app on your Android Smartphone or iPhone from the Play Store or App Store. After installing the app, you must pair the virtual remote with Roku. Using the remote app, you can connect your Roku device to the WiFi without the remote, turn on the device, and more.
Try HDMI Extender
If you have connected the Roku device to the HDMI port on your TV, your remote may stop working because of the HDMI interference. So, you can try using the HDMI extender to connect your Roku device to the extender and check if the problem is fixed.
Reset Roku
The final fix is to factory reset Roku. It removes all the data stored in the device and personal preferences that you made. So factory resetting your Roku device will solve the issues and let your Roku remote work again.
Replace your Roku remote
If none of the above-discussed techniques helped to fix the problem, you don’t have any other methods other than replacing your remote. You can purchase a new Roku remote for your streaming device from the Roku online stores and a few other online retailers.
FAQs
The reset button of your Roku remote is located in the battery compartment.
Yes, you can pair the Roku remote without the Pairing button using your smartphone and the remote option on your TV.
When your Roku remote’s batteries are drained or low, you can see the green light blinking on the remote.
![How to Reset Roku Remote [Updated 2023] How to Reset Roku Remote](https://rokutvstick.com/wp-content/uploads/2022/12/How-to-Reset-Roku-Remote.png)