We all know how important WiFi is to connect your iPhone to your Roku device. But you might come across situations where WiFi may not be available. So, you can try alternative methods to connect iPhone to Roku externally. Go through the below steps and learn how to connect your iPhone to Roku without WiFi.
Methods to Connect iPhone to Roku without WiFi
Connecting the devices without WiFi can be done by using an HDMI cable or by using Bluetooth by following the below-mentioned steps,
Connect iPhone to Roku Using Lightning to HDMI
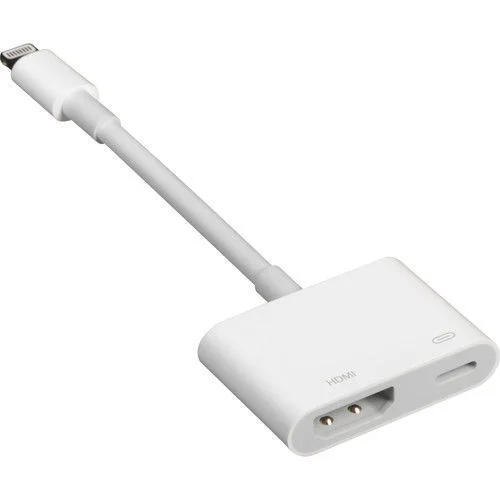
Before starting the process, you would require some devices to proceed using Apple Lightning to Digital AV adapter and HDMI Cable.
1. First, Connect the Lightning end of the adapter to your iPhone’s charging port.

2. Then, connect one end of the HDMI Port to the adapter and the other to the Roku TV.
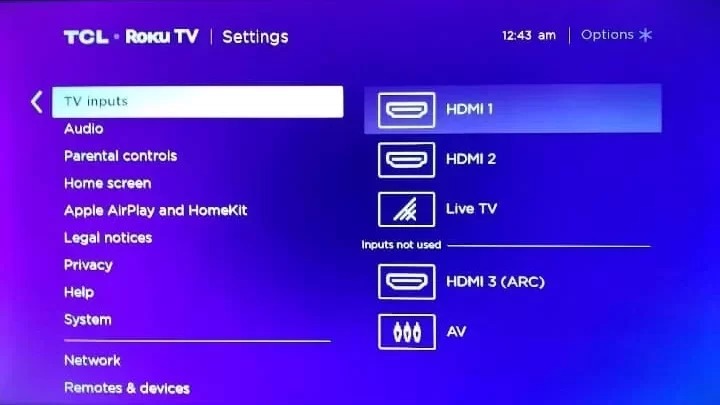
3. Press the Home button on your Roku TV remote.
4. Move to the Settings option and select the TV inputs.
5. Click on the HDMI port and select the TV input option.

6. Finally, move to the home page and select the HDMI port.
Once the process gets over, you can start using the iPhone on the Roku TV.
Note: Connecting your iPhone with Roku can be easily done using the AirPlay option.
Connect iPhone to Roku TV Using Bluetooth
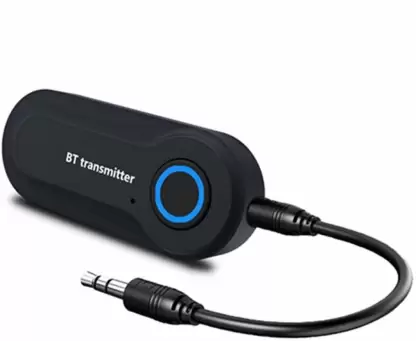
This process can be done using a Bluetooth transmitter like Roku TV’s Bluetooth. Bluetooth transmitter enables devices to stream high-definition sound to speakers and headphones.
1. Connect the Bluetooth transmitter to the Roku TV’s Headphone jack.

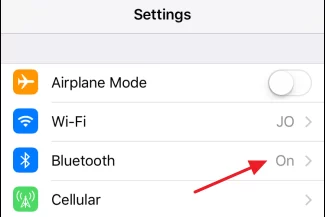
2. Move to the Settings option and click Bluetooth from the iPhone.

3. Then, turn on the Bluetooth and select Bluetooth transmitter from the available devices.
4. The device will be connected, and you can start using the iPhone.
5. By doing so, your iPhone screen will appear on your Roku device.
So, the above-discussed methods are some of the reliable options to connect your iPhone to your Roku device when there is no WiFi option. This would let your screen mirror and enjoy watching content from your iPhone on a bigger screen.
![How to Connect iPhone to Roku without WiFi [2 Methods] How-to-Connect-iPhone-to-Roku-TV-without](https://rokutvstick.com/wp-content/uploads/2022/11/How-to-Connect-iPhone-to-Roku-TV-without-WiFi.png)